Recently, we have been forced to completely abandon our approach of interviewing people in their natural environment for our user-centered design projects. Normally, remote interviewing was only a second choice, mainly due to cost and time reasons. Now it must be our first choice for B2B and B2C research.
The concept of our remote interviews consisted of two parts: a walkthrough and an interactive interview with "visual evidence" (in which order is a strategic decision). We did projects with healthcare professionals and other B2B stakeholders and learned that they were open for remote interviews. Some of them were tech-savvy and already had some know-how. For others, it was their first time doing a video interview in a professional setting. The same was the case for the users, patients, and consumers we interviewed. Some were very familiar with video calls through their work or family life, and others were nervous but very excited about being interviewed online.
Tip: Use a video call tool that people feel familiar with. Often this is Zoom (outside the corporate context) or Webex and Teams, especially within companies. All of these tools give you more or less the same functionalities for running interviews.
Part 1 – digital walkthrough: understanding the user’s perspective of your product
As a digital agency, our project focus was often the digital context of those experienced professionals. It's a clear advantage to interview remotely:
Interviewing participants directly via video calling offers additional possibilities like sharing links directly, looking at diverse web sources, and most importantly, making a 'walkthrough' of specific websites/apps via screen-sharing. Cognitive walkthroughs are effective because they consider the visitor's task on the site. You can moderate the session, facilitate the conversation with questions, or let the participant explore autonomously after a clear instruction. We mainly used our screen-sharing functionality and then navigated through the website following the instructions of the participants. This allowed us to get very specific feedback on the look and feel, navigation, and overall functionality of the website. Follow-up questions in the interview itself are valuable, as they can help you dig deeper and learn more about why users struggled with a task or their overall perception of an experience.
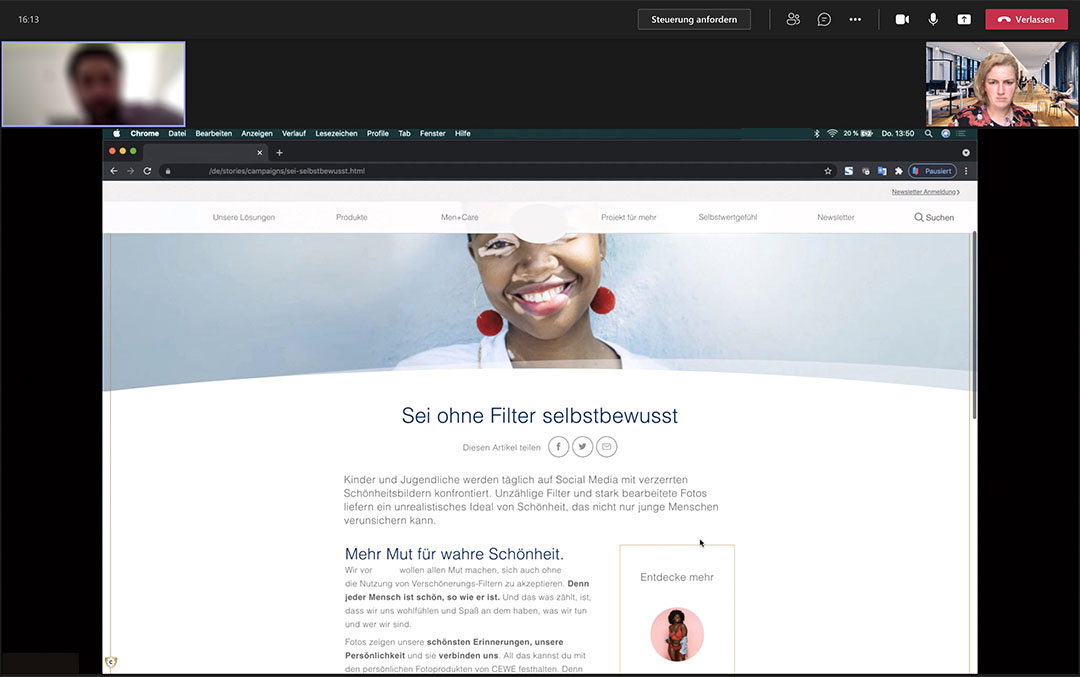
Tip: When preparing ‘walk-throughs’ with your participants, share your screen and let the participants guide you through the website unless they are extremely confident with video calls and navigation. Letting the participant guide you is an opportunity for them to cultivate what is known to 'think out loud' while browsing through the site. Not only do you learn how they navigate through the site, but you also learn why they do so.
Part 2 – interactive interview: visual methods for information gathering during an interview
Some of our online research tools include exercises or research activities like card sorting, mapping, or visual narration, which we have facilitated in the past rather than manually on paper. Using digital whiteboards like Miro or Mural is a very convenient and much cleaner and more efficient solution. We felt that these visual elements stimulate participants' thoughts, and the interaction facilitates the dialog. The interviewer gained much more tangible insights by having them visualized rather than just having them verbalized.
Let's take a closer look at how it works: In our digital whiteboard (we used Miro) we created a workspace with 'visual evidence' tools for each interview. During the interview, we shared our screen, explained the tool to the participant, and then ‘arranged’ the tool according to their indications.
First, we feel that this was a very refreshing shift from just talking. It should be noted that some of our interviews last more than 1.5 hours and require a lot of concentration from both the participants and the interviewer. Therefore, looking together on screen is an activity that helps to refocus and concentrate on the topic of discussion, catching some visual stimuli.
Secondly, participants could listen to the interviewers' questions, but at the same time had text and visual clues and anchors that they could follow. This is especially helpful when talking about complex topics that have multiple aspects. By giving instructions, the participants had to verbalize very precisely what they meant and at the same time see the "visual evidence" of what they said. In this way, their answers became more specific and related to a context.
Let's look at some examples:
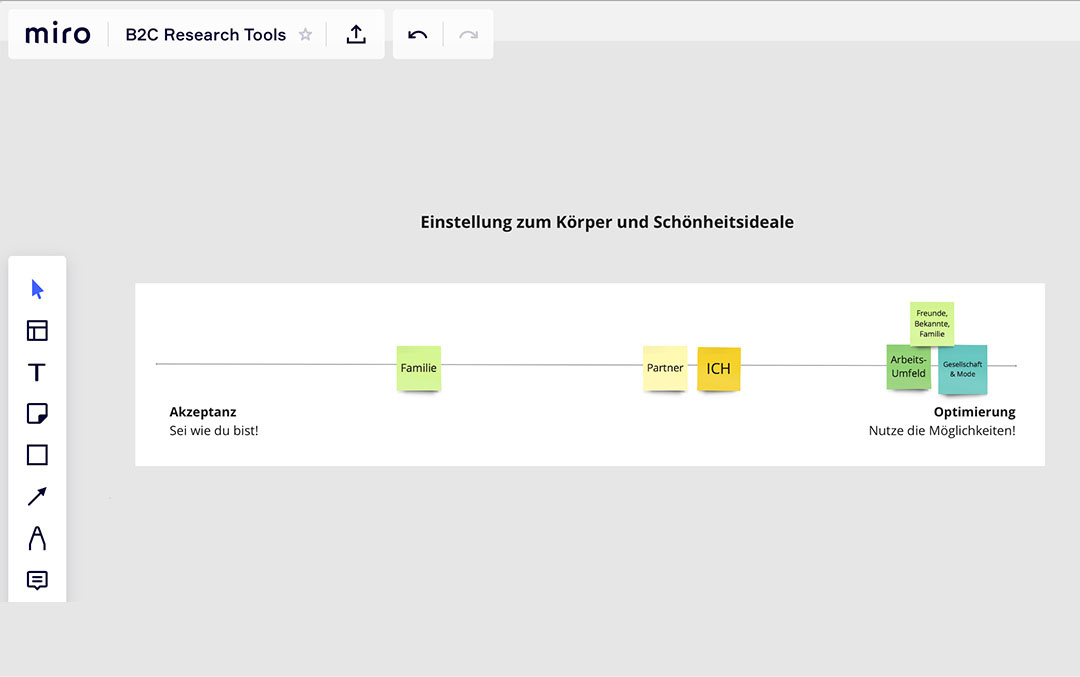
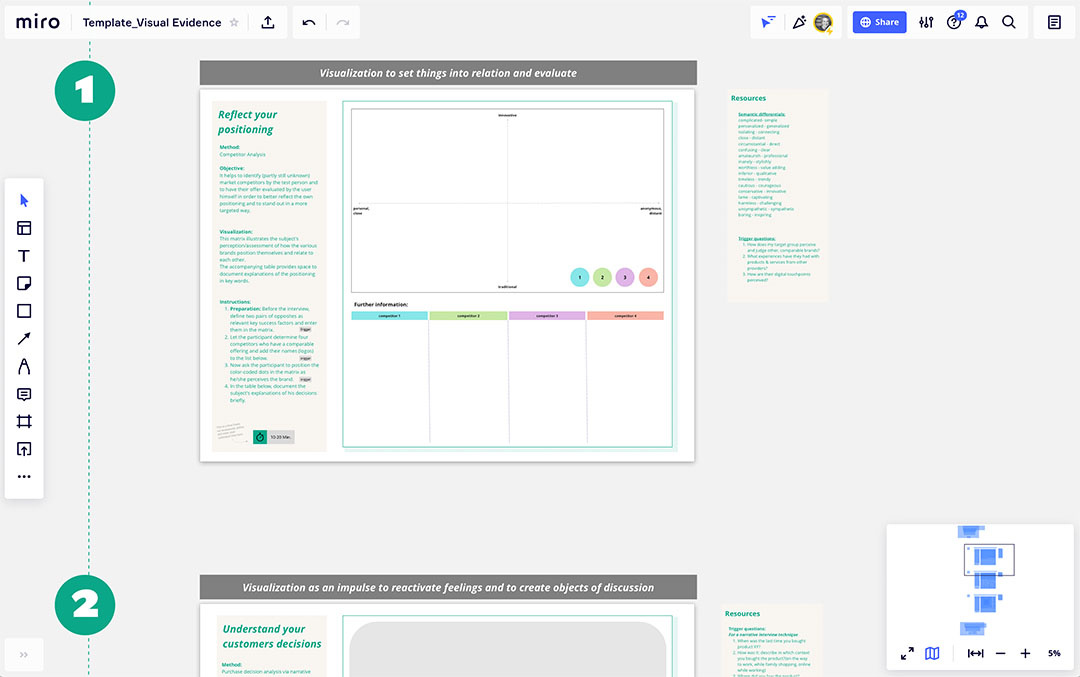
Visualization to set things into relation and evaluate
In this first example, we asked participants to rank themselves on a scale between two opposite polarities. Furthermore, we also asked them to rate the society (the zeitgeist), their work environment, their friends, and their partner. We observe that participants place themselves initially in the middle of the scale. Then they are placing around them the others. When seeing the final 'visual evidence' picture, they start to reconsider their initial placement. Often, they group themselves to others while creating more space between those who have a different opinion. In this way, their answers become distinguishable and more concise.
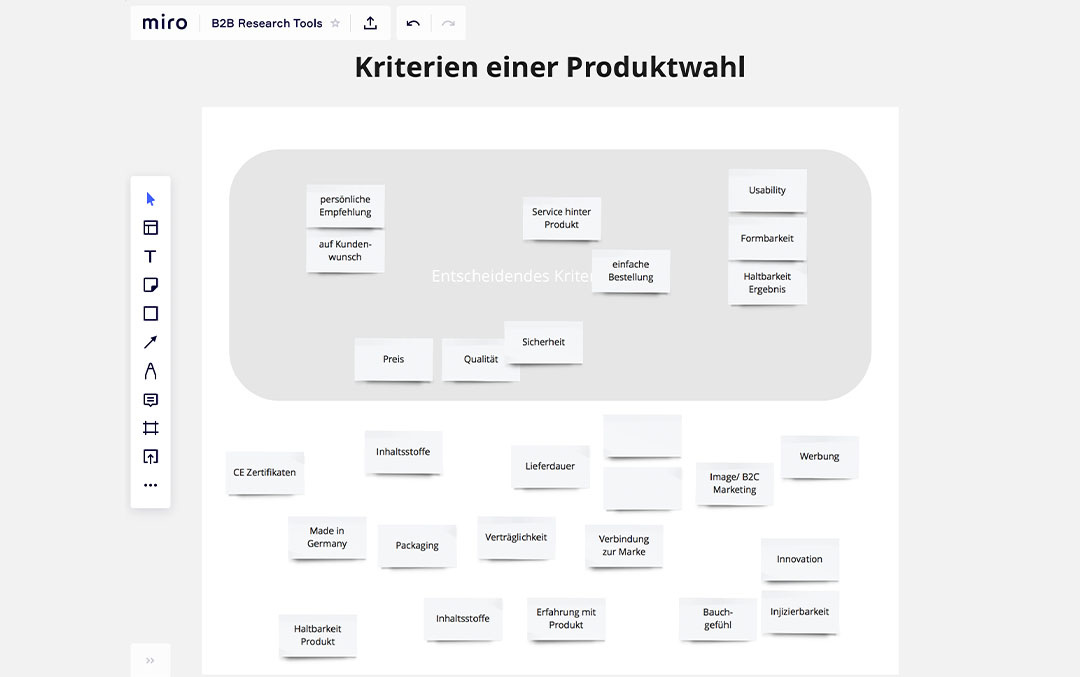
Visualization as an impulse to reactivate feelings and to create objects of discussion
In this second example, we asked participants about their decision-making in product selection. A task that is relatively difficult for people, as recalling thoughts and emotions of product choice in the past is challenging. Narrative interview techniques (see trigger questions in the template) can be used to recap situations. Through pre-made post-its, visual objects of discussion that enabled participants to develop further criteria relevant to themselves were created. Like this, the participants were able to provide specified statements as to why they decided for or against a product.
Part 3 – Visual evidence as a documentation tool
In addition, we have found that digital whiteboards can also serve as documentation and storage tools on their own. Collecting all visual evidence from all interviews creates a rich set of visual evidence that vividly documents the findings. However, it is not an analysis tool in the true sense of the word, as its search capabilities, automation, and categorization are rather rudimentary.
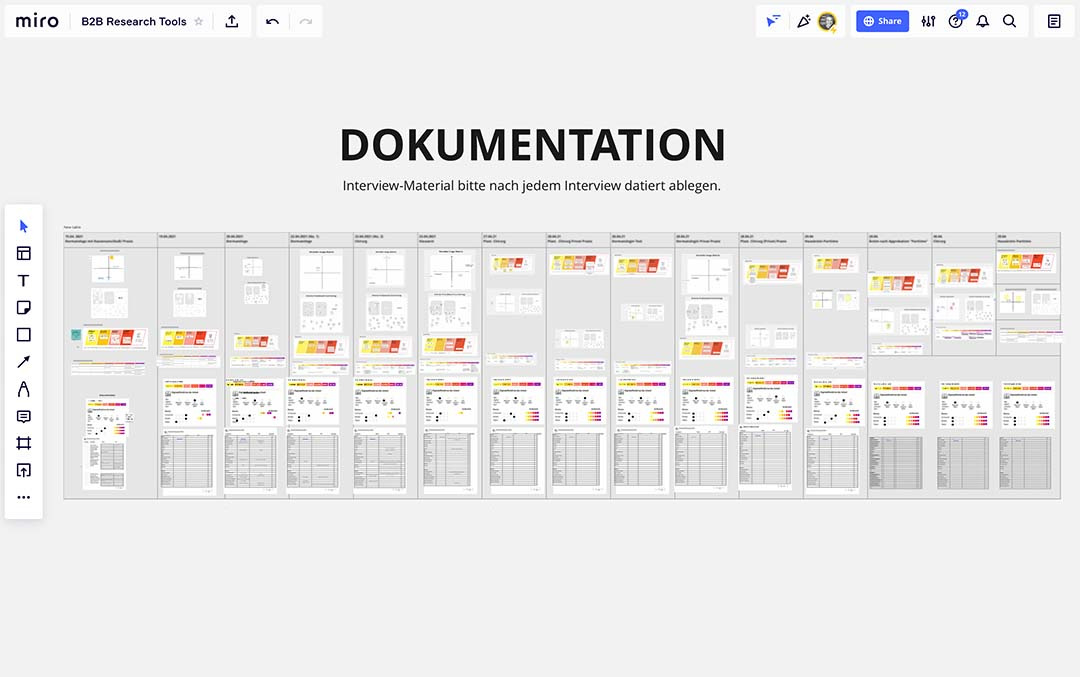
Tip: Screenshot or copy all the visual evidence from your interviews on our board and give your team access to it. In this way, everyone can review the visual evidence for themselves and associate with it visually, too.
We would like to share some templates with you, for making your own experience with visual evidence in video interviews.
Let us know about your experiences conducting research remotely using a variety of tools and methods. Feel free to get in touch with us!
We would also like to thank our team members Erik Wedeward, Sandra Dernbach, and Zlatko Buzalijko for their remaining valuable contribution to this issue.


